In this section you can enter the specific details of hardware spare parts that have to be Brought back. All relevant details such as accessories and their serial nos, physical condition of the material or reason due to which the problem would have occurred can be specified in respective boxes. On completion of the information in this section it has to be submitted.
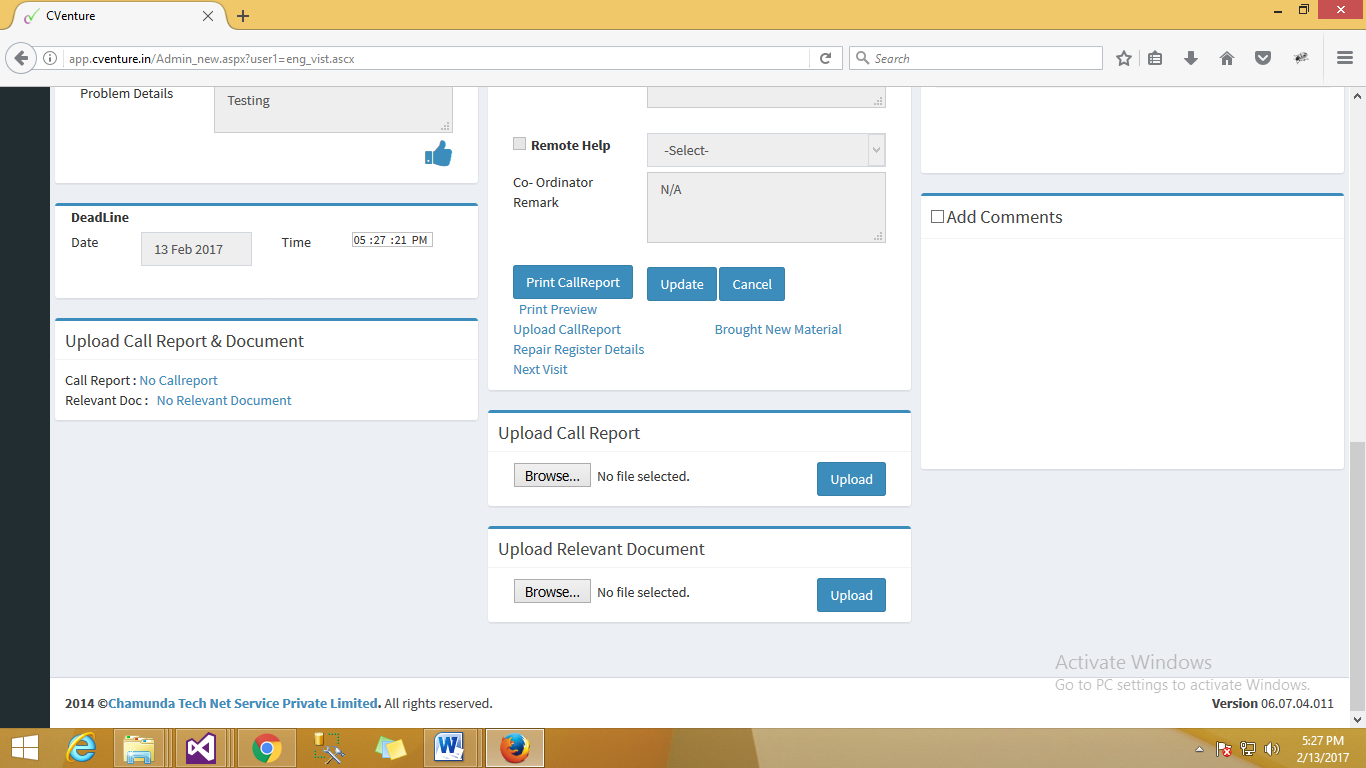
Fig :- Repair Register Link
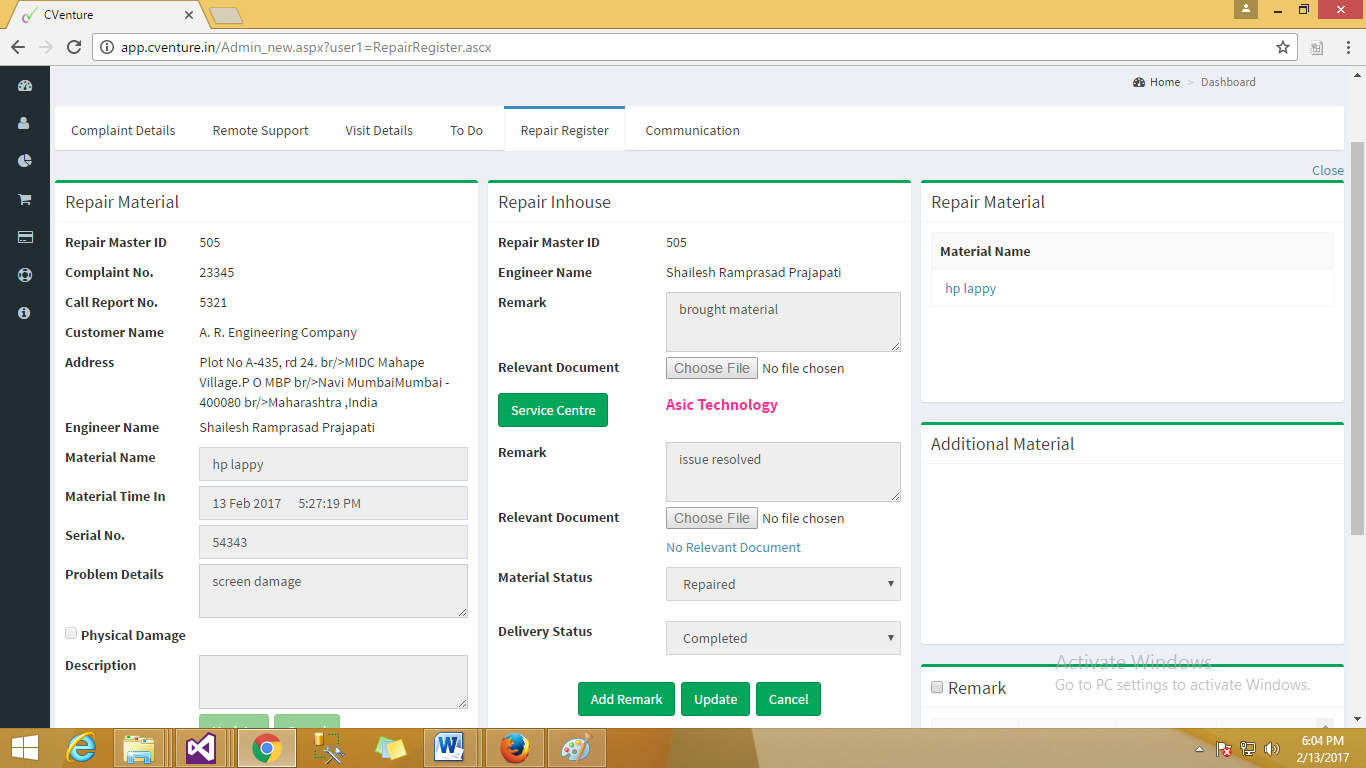
You can view the action taken on brought material in Repair Register Details
The Repair Register Details view is as shown below.
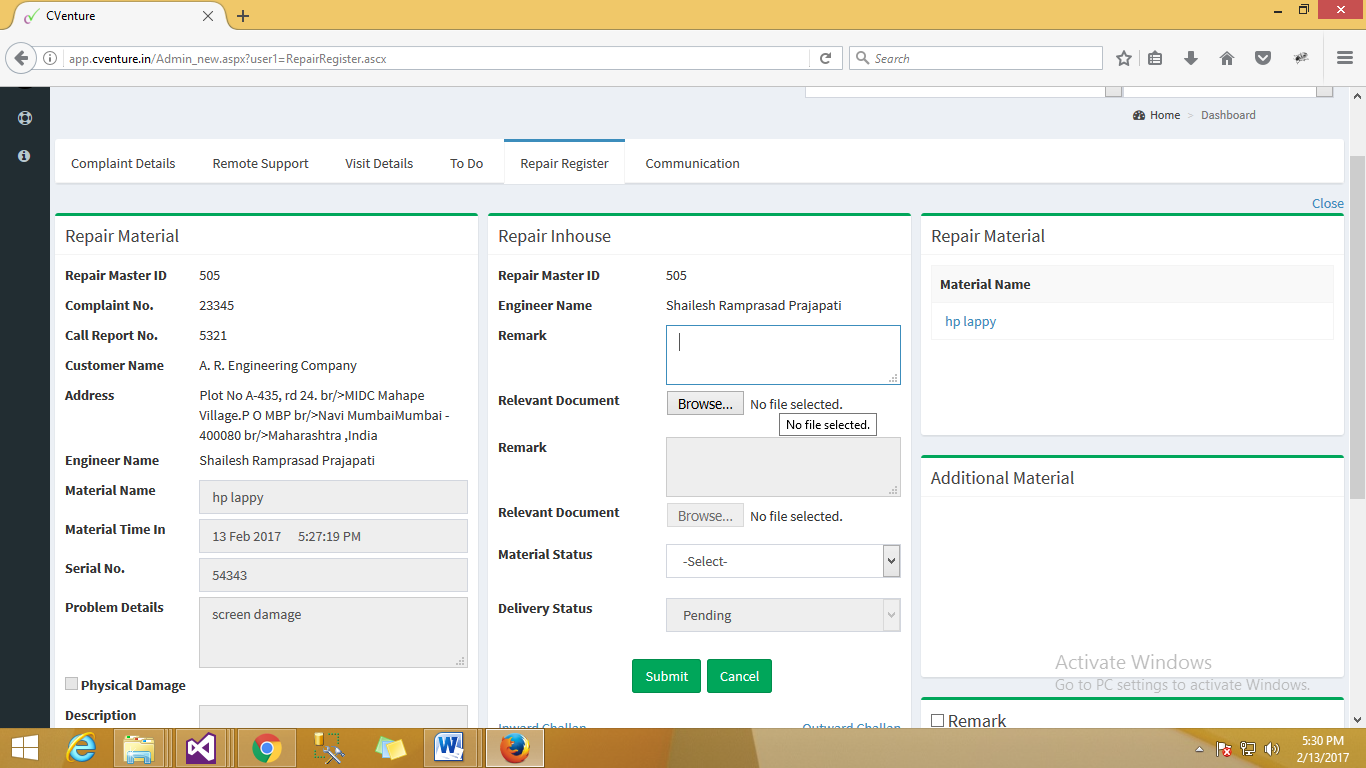
Fig :- Repair Register Details
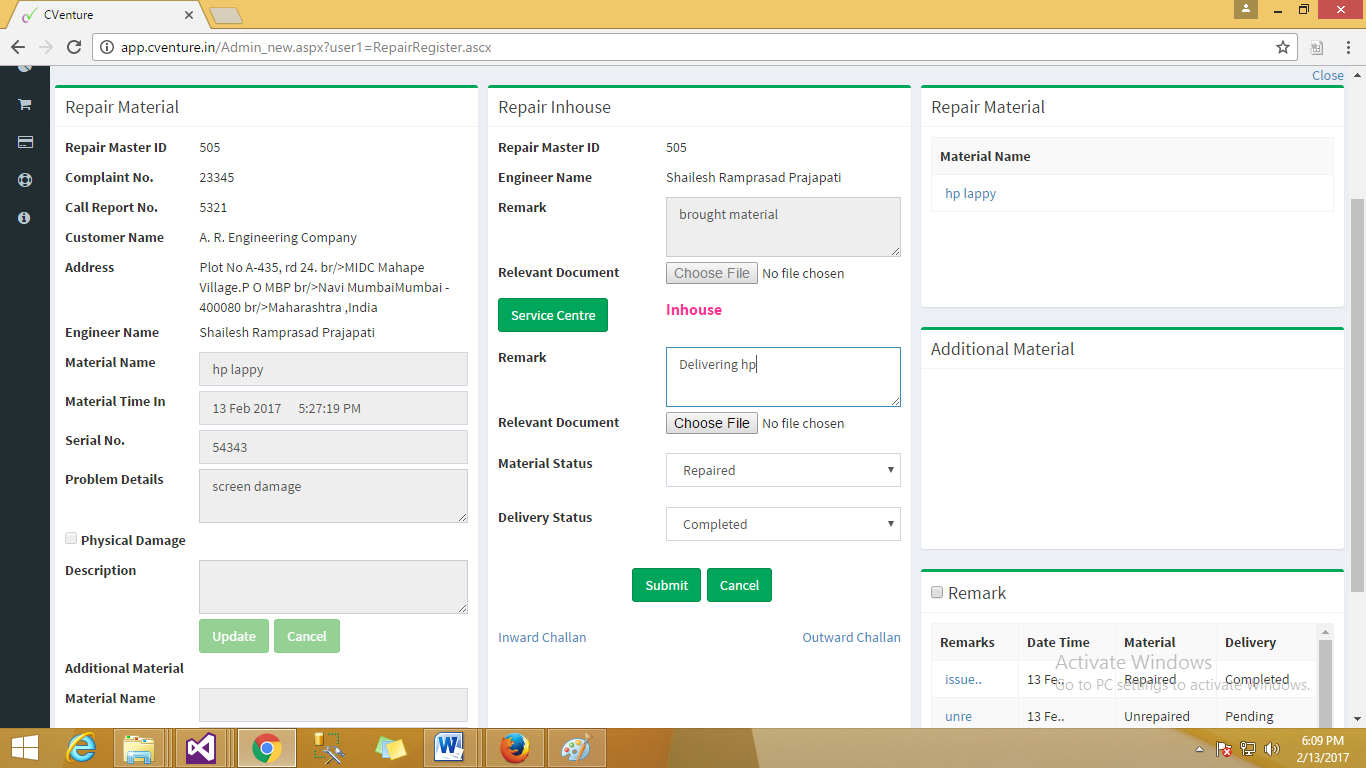
You need to add remark in the Repair Inhouse Section and then click on submit button in order to finalize the inward process of the faulty spare.
Inhouse Label will be visible as proof.
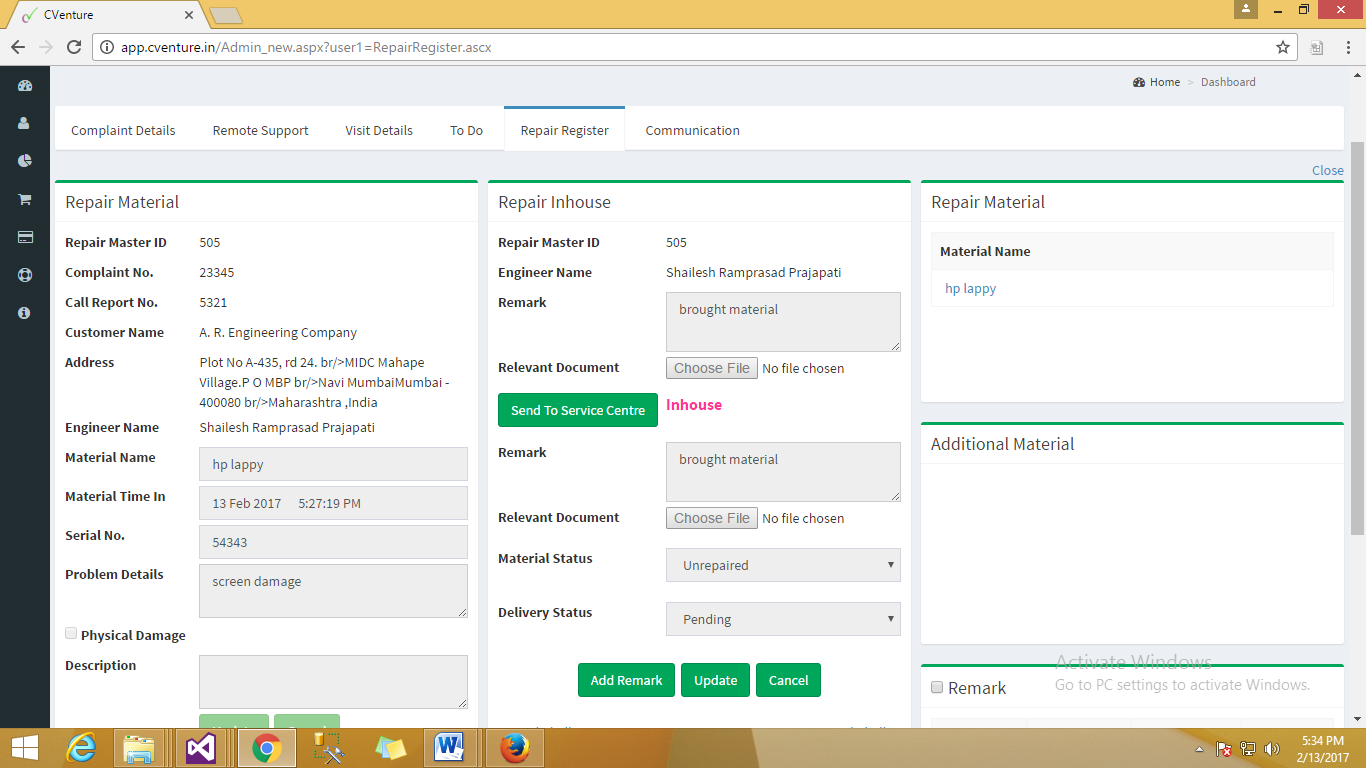
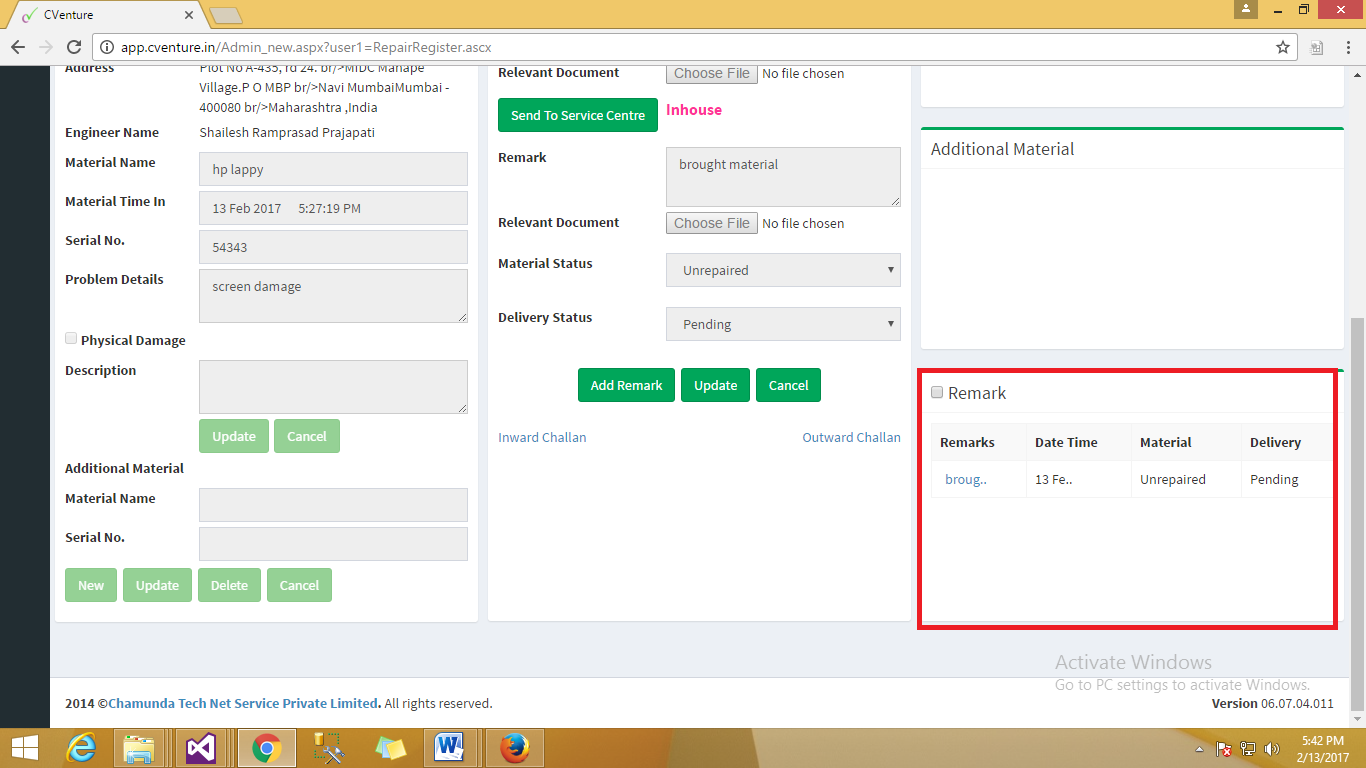
If you are trying to repair the issue in office with the help of your own technical assets then Click on add remark and update the progress. Updated progress will be visible in Remark.
In case the issue remains unresolved and you need to take external help or expert services then you need to click on Sent to Service Center and carry forth the process.
![]()
Fig :- Send To Service center
Service center page is shown in the image below.
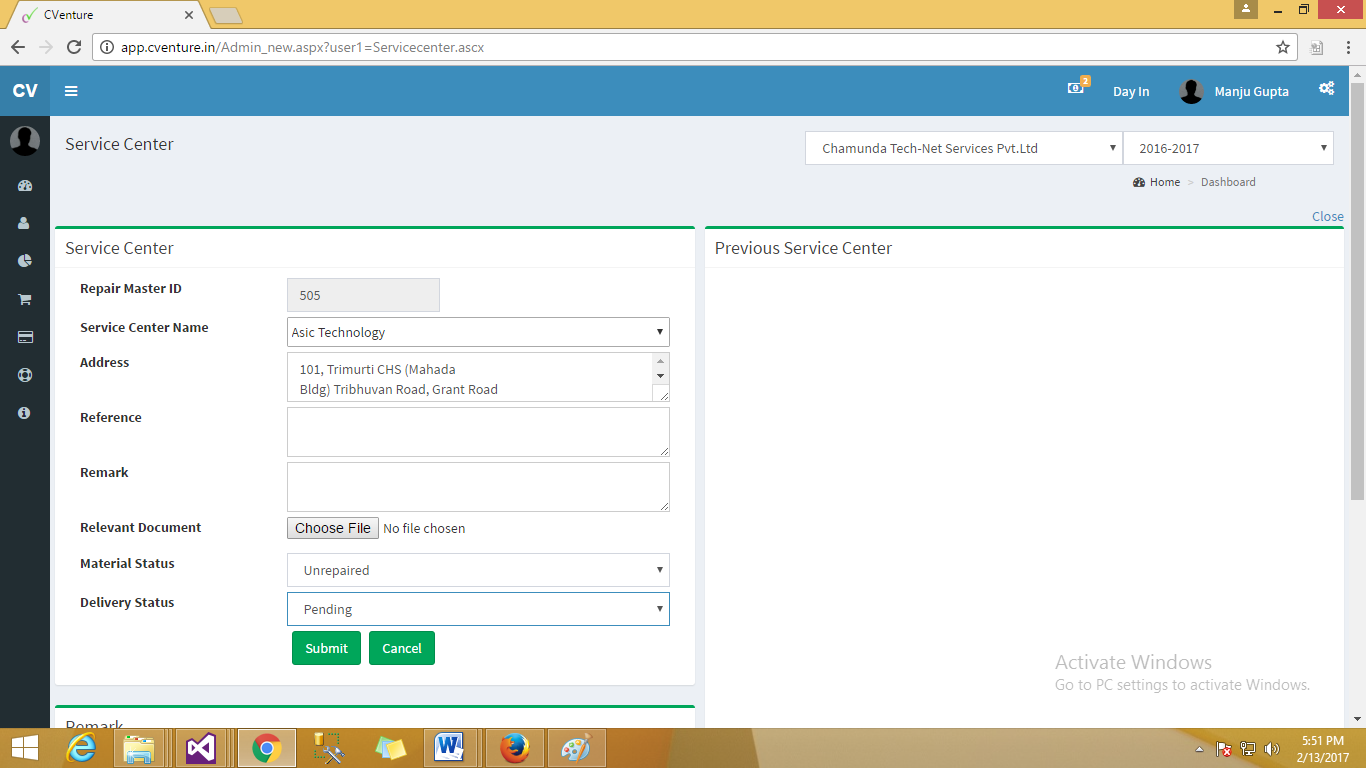
Fig :- Service Center
Click on submit button in order to finalize the process for Service center page.
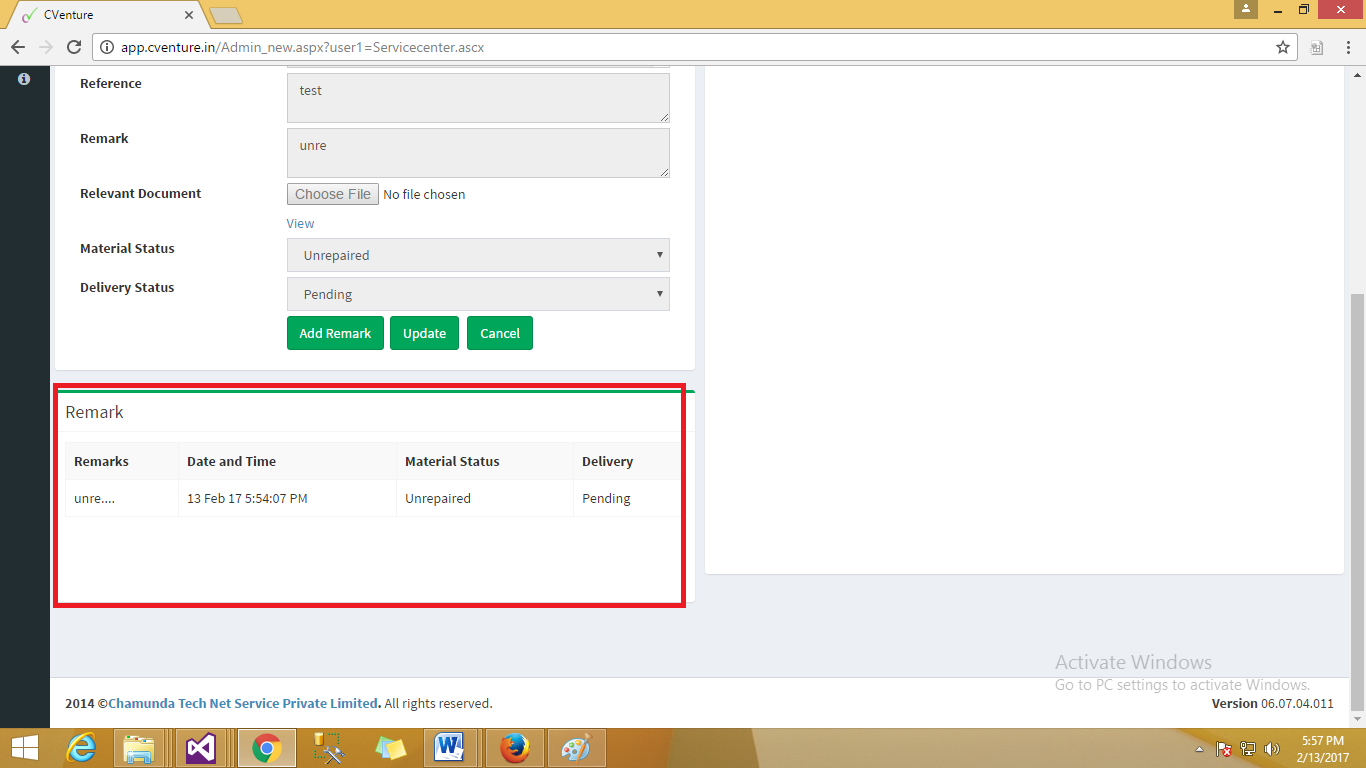
Fig :- Service Center Remarks
Click on Submit/add remark and update the progress. Updated progress will be visible in Remark.
Once the issue is resolved you can bring back the material by opting the status repaired and completed on add remark
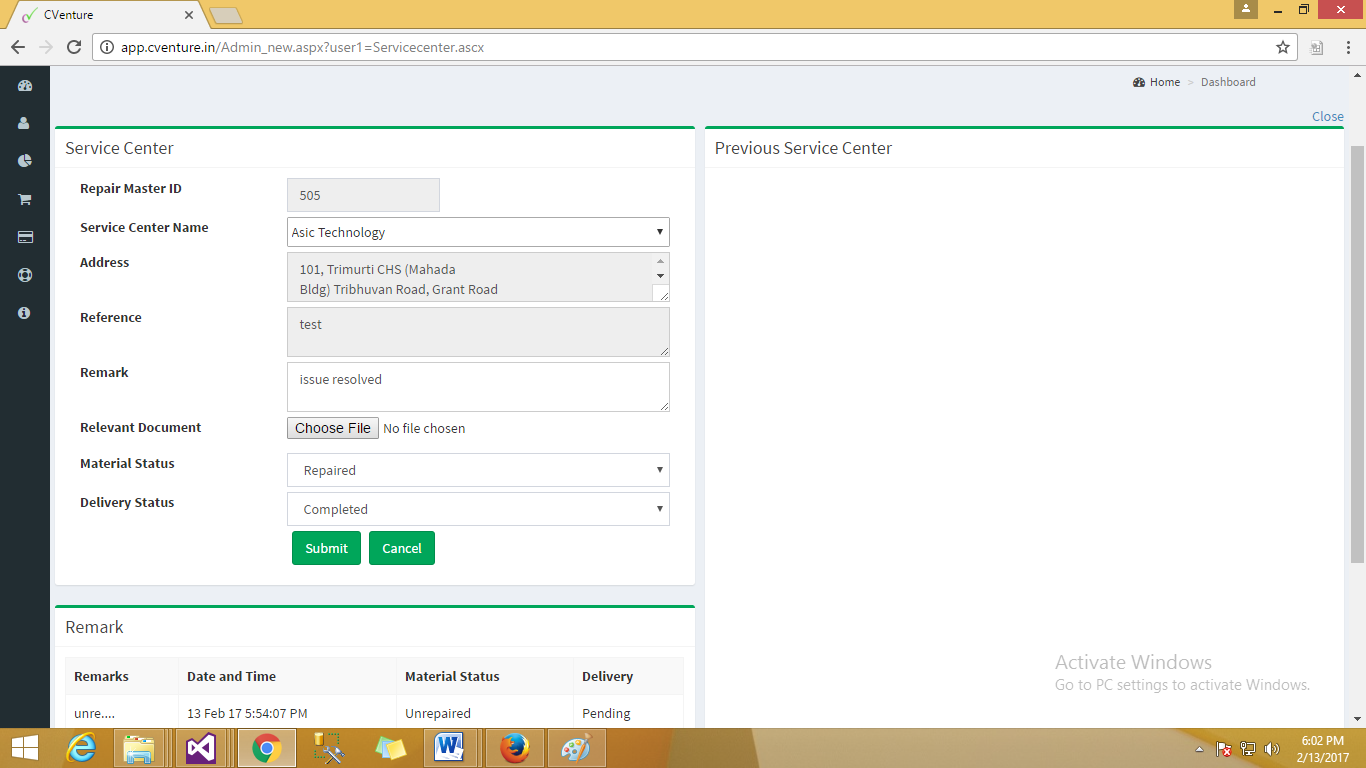
Fig :- Service Center Material status.
Click on submit button to complete the process of service center page.
In order to reflect the status of service center page’s completed status add remark on page.
Delivering the material back to respective owner, kindly update remark and click on submit.
You can provide the proof of repair by giving by the owner Challan/ Delivery Note copy which is generated via outward challan
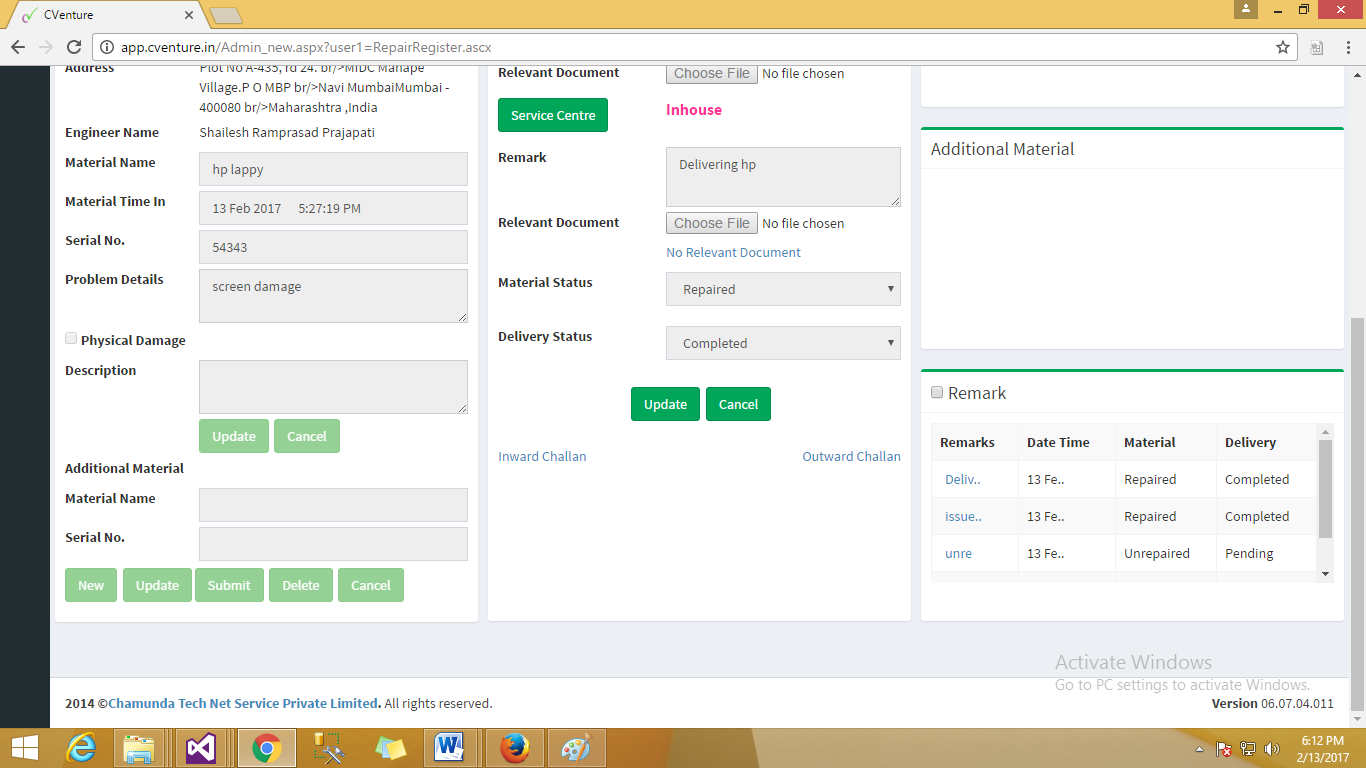
Fig :- Outward Challan Creation
For challan/ Delivery Note to be printed, the material name should be checked and then the Delivered By must be selected and assigned to an office delivery person.
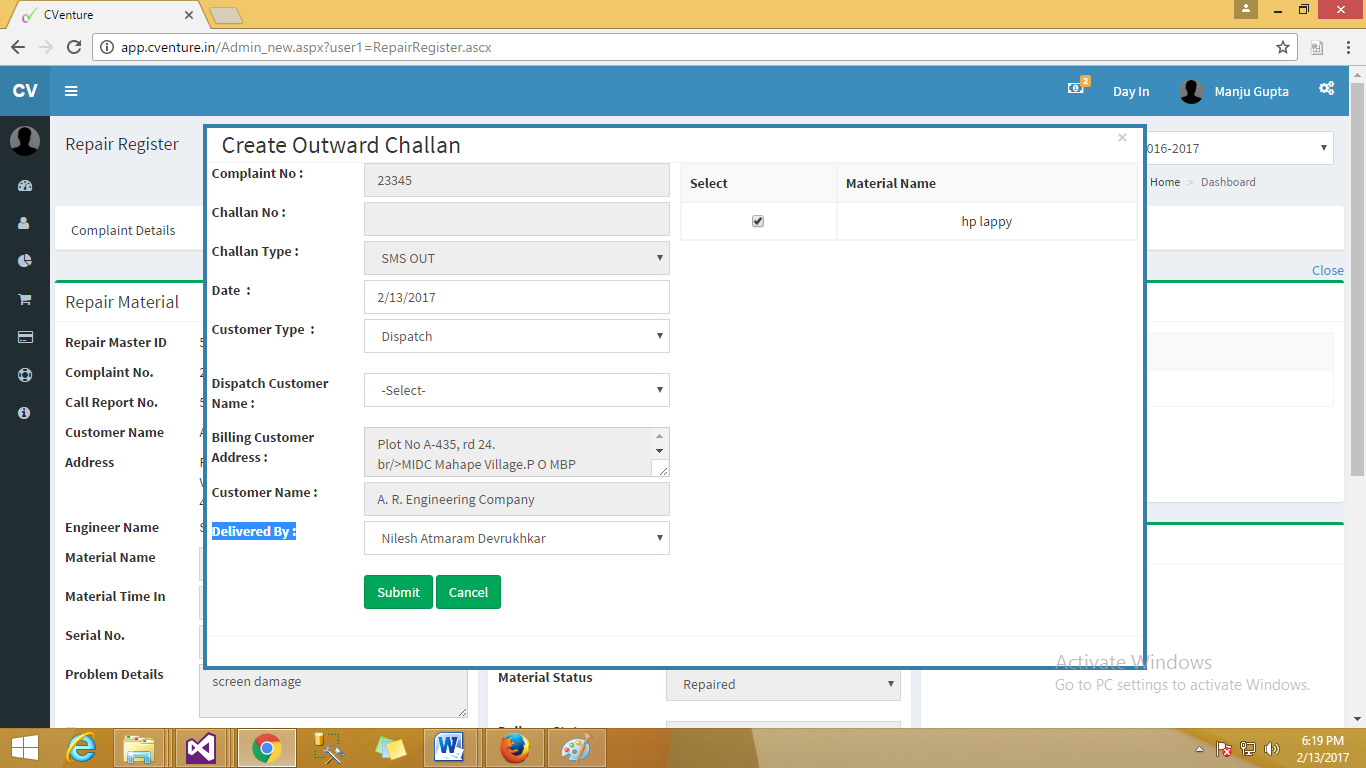
Fig :- Create Outward Challan
For downloading Challan, Click on VIEW button
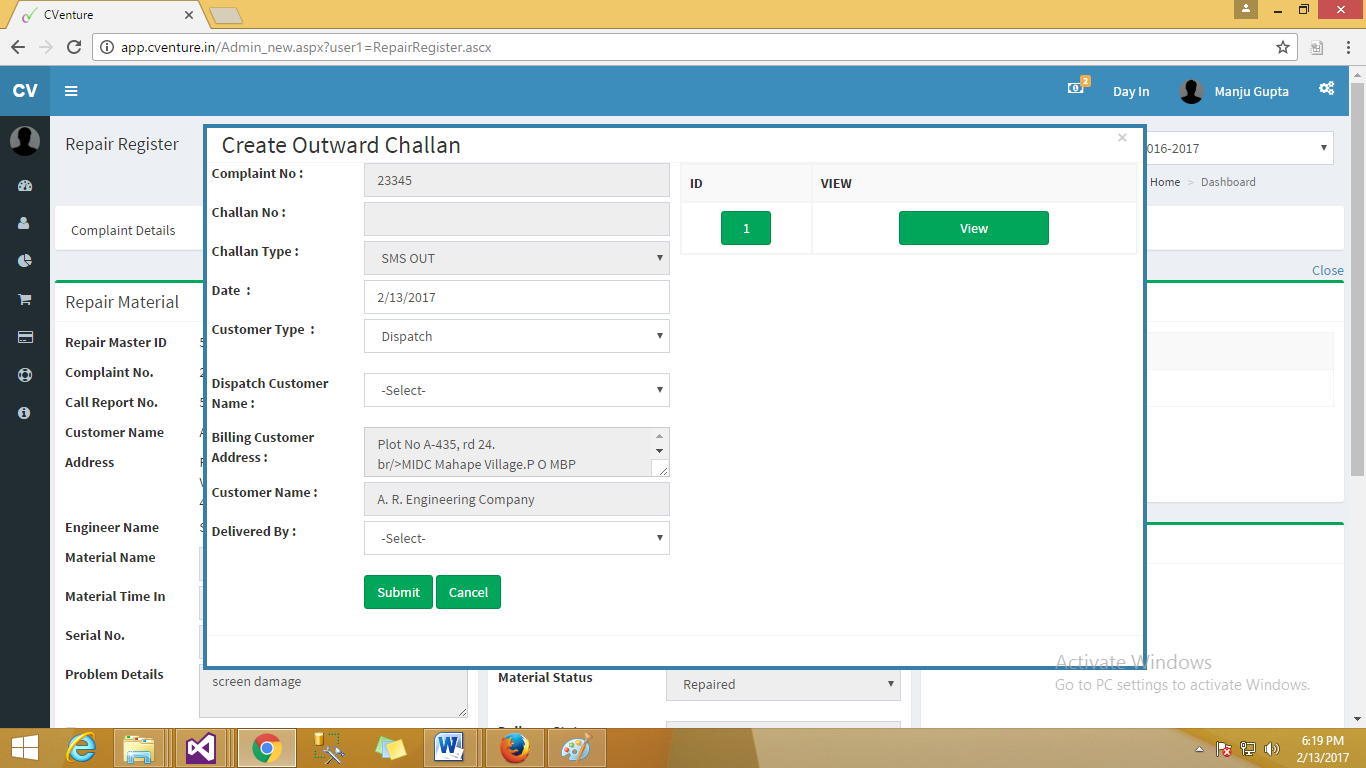
Fig :- Download Challan
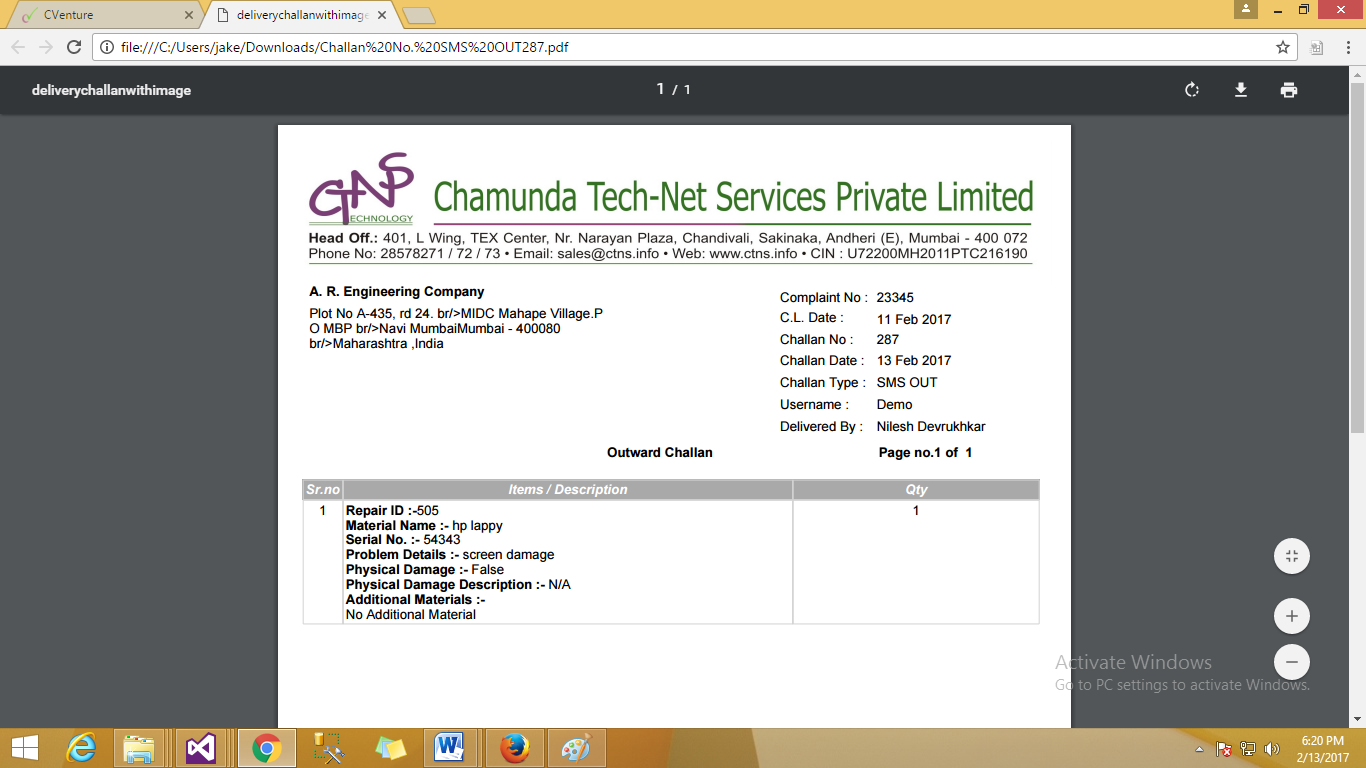
Final Challan will look like this.
Once the challan is generated you can either send an engineer by reassigning or changing the assignment to a new engineer.
Change assign means assign same problem to different Engineer .
Reassign means assign same problem to same Engineer .
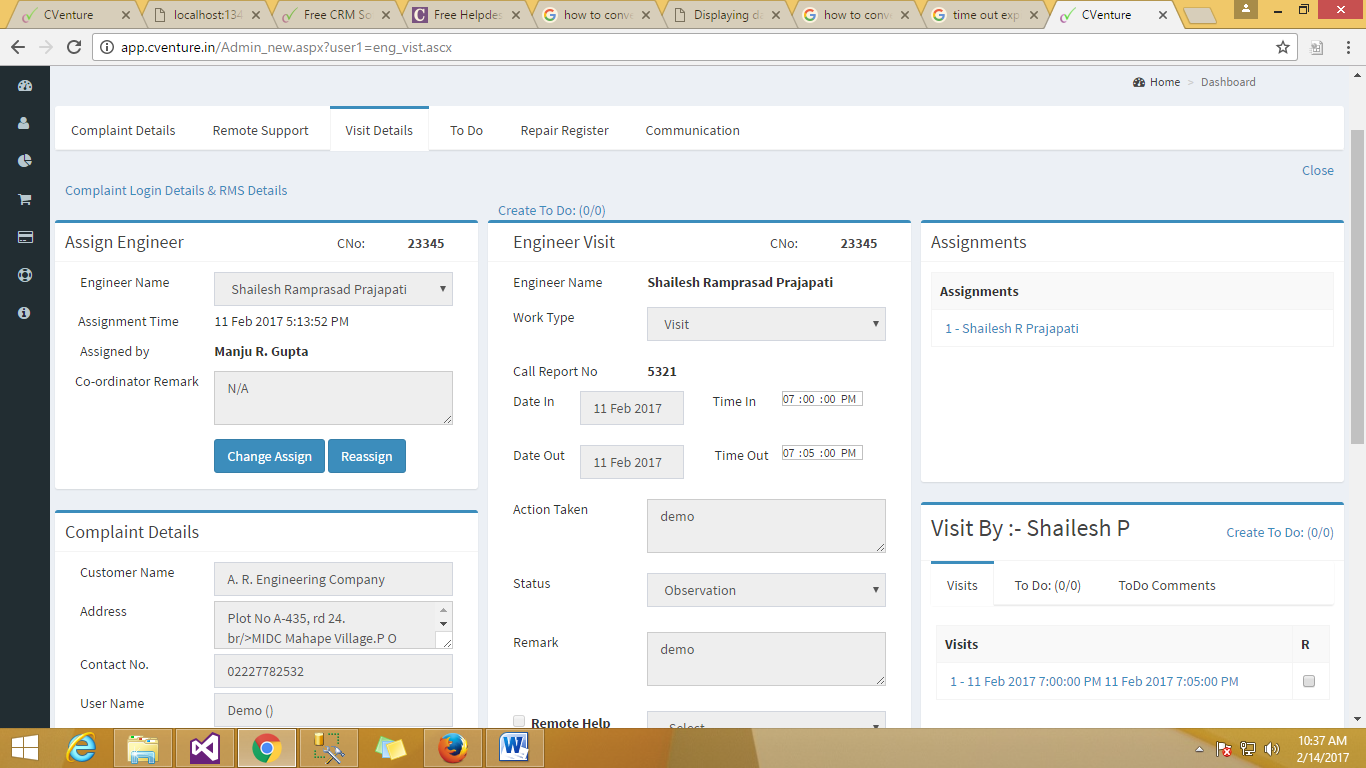
Fig :- Assign Engineer
Every Engineer can print their call report in order to confirm their work done on the provided case and keep a copy signed by the customer for further reference or the same can be uploaded.
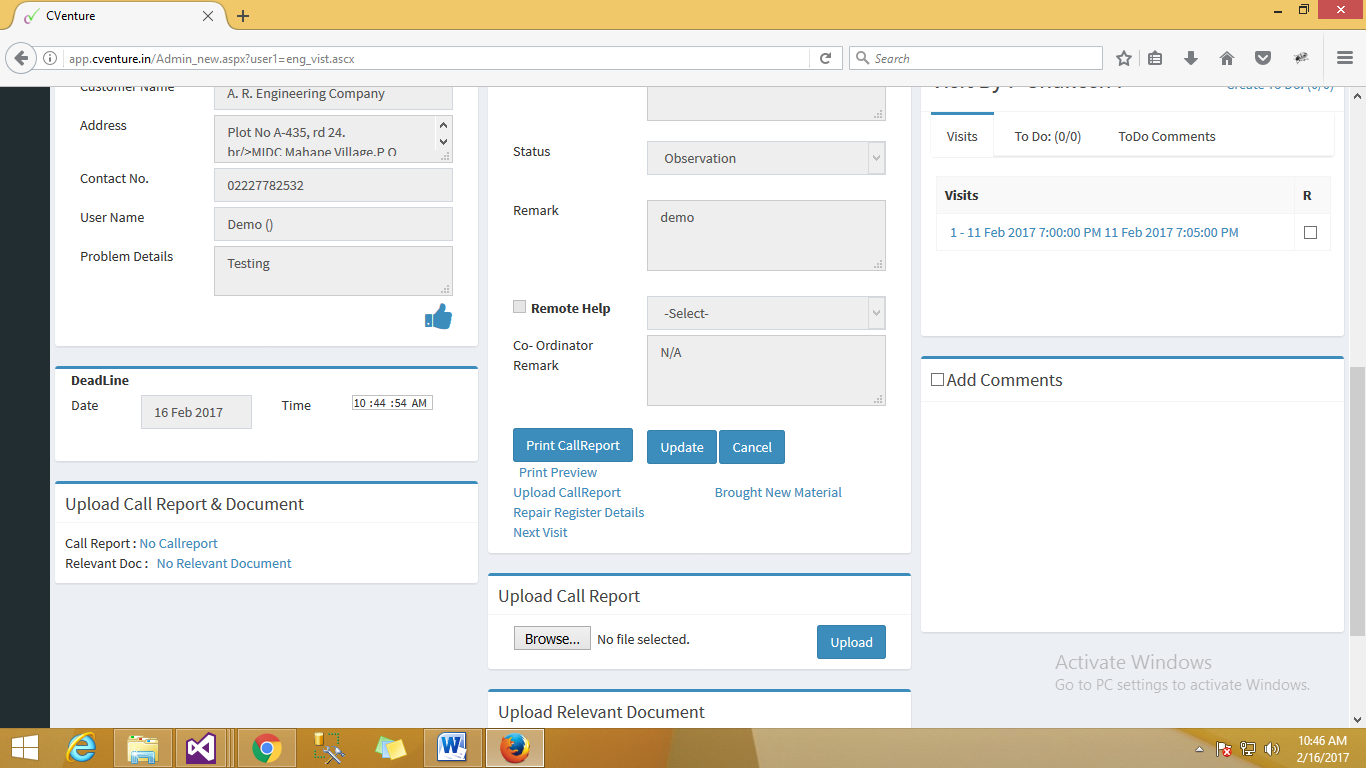
Fig :- Print Call Report
A typical Call report will look like this, for print or pdf click on print icon
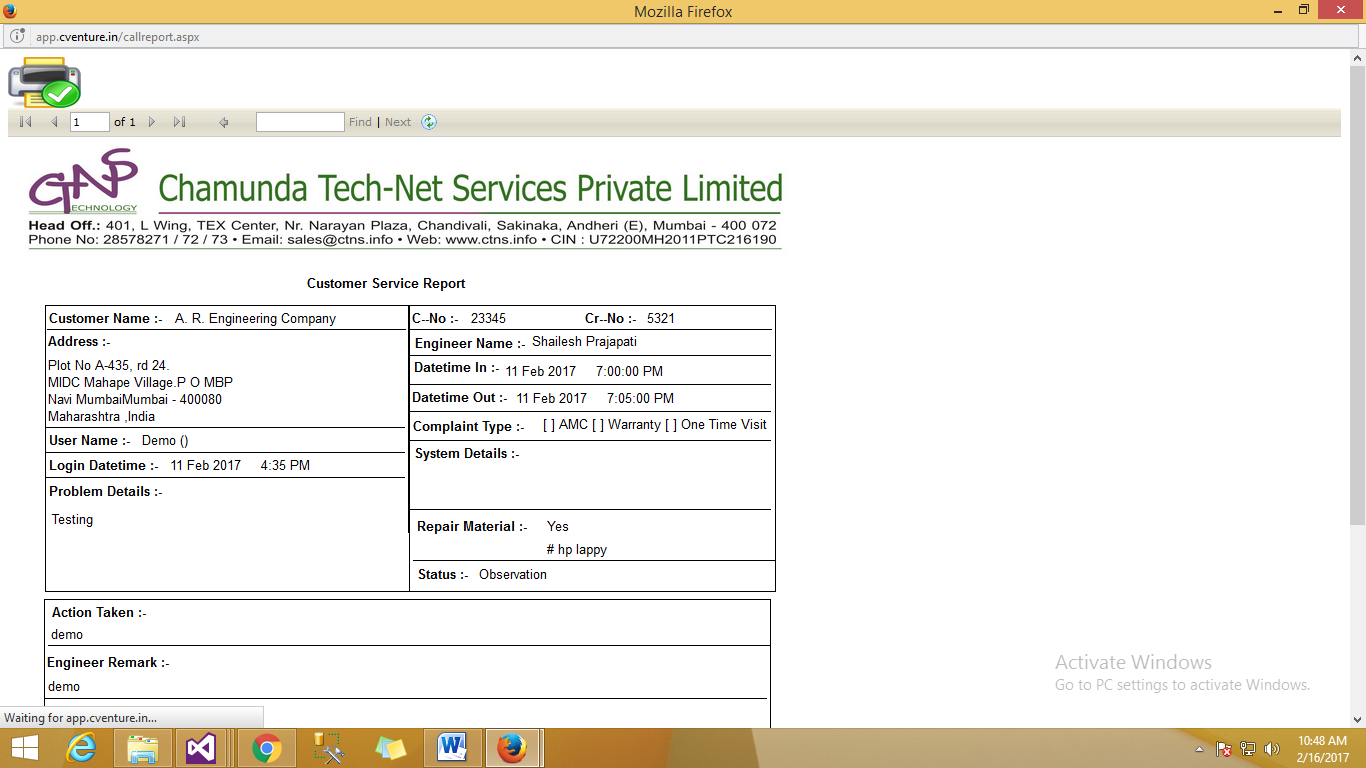
Fig :- Call Report
For uploading Engineer generated call report inside the C-Venture system, you need to Click on upload call report/Complaint
On the page you have to select a category of either complaint no. or call report no.
Based on your selection a section will appear.
And click on show button.
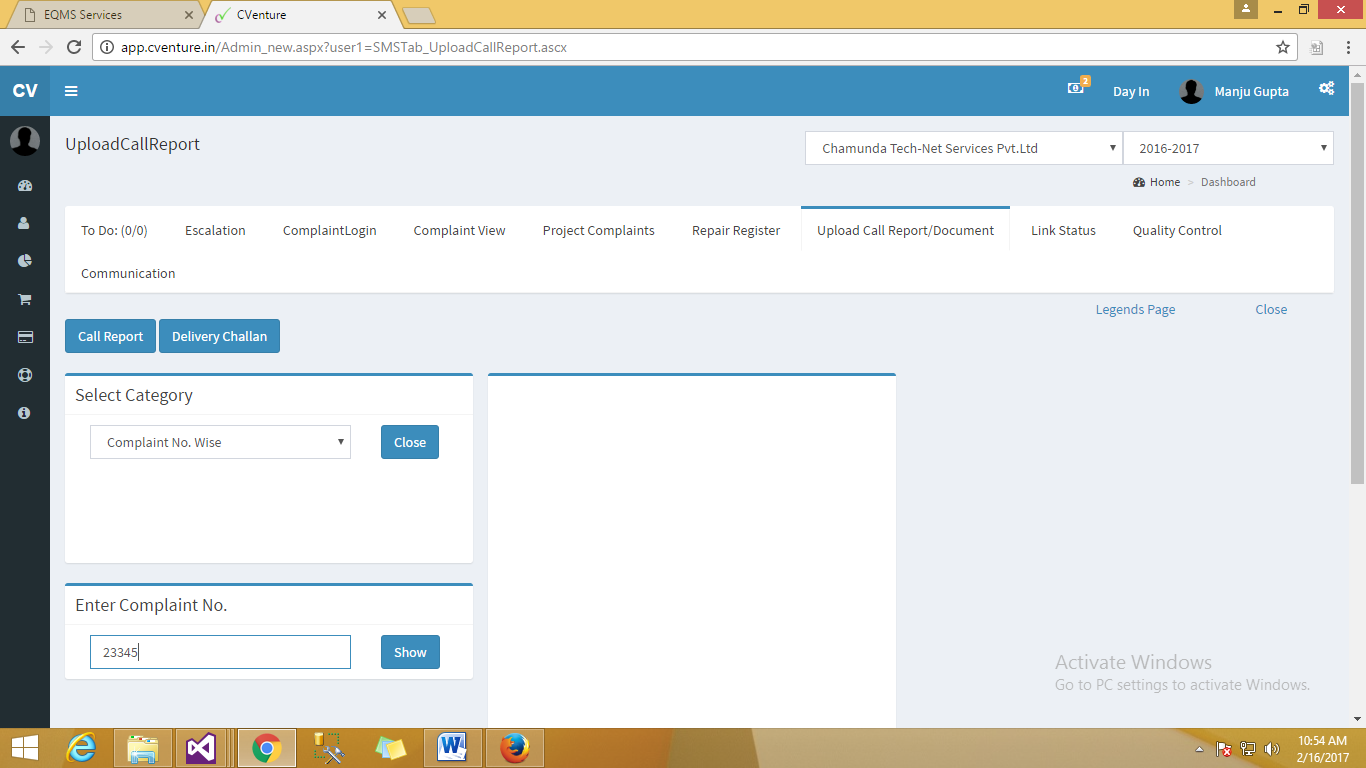
Fig :- Upload call Report.
After Clicking show button the Complaint will be visible in middle window and uploaded data will be visible in the right side window.
In the bottom section of the page upload call report will appear and will allow you to browse for the signed physical copy of the work done on the given complaint.
